Pages

Sunday, June 27, 2010

A day spent in the garden.....

Yesterday was pretty blissful! I was so excited to spend the day in the garden and outside working in the yard. It was warm but not a scorcher and we enjoyed working together as a family! Here are some shots I took of my garden, so far I am so happy with the progress. This is my first year gardening and I am totally hooked.


I had my middle mister "help me" plant some seeds. I don't think we are too late, I hope not!


Any guesses on what we planted together?

I hope that we get some big ones by Halloween! I want a whole bed full of these next year! Actually that is true of pretty much everything I have grown so far. I want more next year. I also planted some okra, but that was after my little helper scampered off. I guess the gardening bug has bit me. In the next picture you can see where we tilled this year under the black plastic. We ran out of money for fencing material though so hopefully next year all that area will be garden.


Yeah! A tomatoe, I can't wait until this baby turns red! It is off of my Early Girl plant.


Ohhh, my eggplant seems to be doing good too, I LOVE eggplant and can't wait to watch them grow in my own garden!


This is my favorite picture of the day. My two little men walking up to the house from the garden. And no, I don't let him run around naked all the time, just on Saturday. ha ha.


This post is linked up to Frugal Gardening ~ A Blog Hop!

Wednesday, June 23, 2010

Woeful Wednesday's #1 - Little boy blue, I am done nursing you!

Woeful Wednesday is a new little concept that I thought of while wiping down the bedroom doors in our hallway today. Every week has a little blue, a little sad, a little frustration, a little, well, WOE! I don't believe in letting ourselves wallow around in gloominess or to complain too long, too often or about too many things. BUT. I do think a little venting now and then is a good thing. Especially if you have a glass of whine, errr... wine in one hand and a friend sitting close by. Sometimes though it helps to blog about frustrations, oh, it could be anything, kids, house, sewing projects that don't turn out quite right! I am hoping that by sharing our frustrations, we can gain some insight, some inspiration or just get something out of our head!  I am going to make this a linky party so if you want to add your own woe inspired blog post you sure can. And if it is just me, well that is okay, I like some alone time! ;0)

My woe for today is all because of my sweet cheeks. You can see his darling little grin below.  


This picture was taken back in January and not only has he gotten more adorable, (I know hard to believe that is possible right?) but he has gotten ALOT more demanding and bossy. Only when it comes to one subject though, nursing. Michael is 21 months old, and to be blunt and honest, MOMMY IS TIRED OF NURSING YOU KIDDO! You have had teeth since your 5th month. You started walking at 9 months, you ate solid food way before that, you swim, you ride a tricycle, you jump out of your crib, you wrestle with your brothers, for goodness sakes, you can HIT A BASEBALL! So whats the deal, schmeal?


My 8 year old weaned himself on his first birthday, for real, last nursey during the party and that was that. I expected the same thing with this one, but no here we are 9 months after this and we still NEED mommy milk at least 5 times a day.

When I went to scrapbook retreat in January and was gone for 3 days I thought, this is it! We will be done when I get back. WRONG! Then I went on a church convention and was gone for 4 days in April, and I knew we would be done when I got back, WRONG AGAIN. The first thing he did when I walked in the door was grab his boppy and pat the chair for me to sit down. Oh boy! That boppy got hidden away in a closet first thing.

Michael is adorable and when those big blue eyes are staring into mine and he is saying, pease mommy, while patting the "nursing chair" it is mighty hard to resist, especially when he says, tank ewe, that is "thank you" for those of you not fluent in 1 year old speech! lol But more often than not these days I am being used for a binky, and he tugs hard, and I am not only not enjoying this anymore but it is making me tense and crabby with the whole family. I feel like I have done my mommy duty + and enough is enough. He can cut his own meat for goodness sakes, not that we let him have a knife but he sneaks one from someone else now and then.  


So when he starts the nursey, whine, dance, and routine I first try to get him a drink, then I try to feed him, thinking he must be hungry. But if those don't do the trick and they often don't I try to spend some one on one time with him thinking he must be needing some Mommy time. Often thought these don't work and so I nurse him. And it is driving me crazy.

Today I woke up with resolve, one nursey before bed and that is that. I am the mommy and I am in control.....or so I keep telling myself. After all he can't open the closet door yet and I can always go hide in there with a diet coke and some m&m's.

What has been bugging your mind lately, anything good?


Saturday, June 19, 2010

Sweet Treats for Dad! A last minute Father's Day gift!


If you haven't done it yet now is the time to create something special just for dad! I am putting together a couple different things for my husband and Dad this year. This first one is simple, easy, fun, and definitely heartfelt! Can't beat that combination!

Step 1: Gather different treats, (candies, nuts, etc....) that Dad likes. Don't forget some mini candy bars. I bought mine from the dollar store and I only spent $13.00 on the goodies for BOTH gifts.

Step 2: Find a container that you can fill up with the above goodies.

Step 3: Cut strips of paper to wrap around the candy bars. I used scrapbook paper, make sure it doesn't have a pattern on the back. This was a good way to use up some that I had in a stack and probably wouldn't have picked to actually use in my scrapbook. I cut mine 1.5" by 4".

Step 4: Write silly, heartfelt, or loving messages on the back. Let the kids color pictures or sign their names.

Step 5: Glue the wrapper around the candy bars and assemble basket. I used a hot glue to add just a dab of glue and they stuck really well.


Here are some examples of my sayings:

(For my Husband)
*Good for 1 night off from Dad duties
*Good for 1 fre back rub! Love you!
*Heres to a great Dad who gives baths, makes mac n cheese and coaches little league.
*Happy Fathers Day to a winning coach!
*Thanks for being the greatest Dad to our 3 boys!

(For my Dad)
*Thanks for always making me laugh!
*I am so proud of you and The Red Shed! You Rock!
*Thanks for always watching our for me and bailing me out when needed!
*Thanks for loving my kids as much as I do!
*Thanks for giving great advice. And only when asked!

On the jar of peanuts I used some left over paper to make a label that says "Happy Father's Day from your nutty kids. (On my Dad's I wrote, from your nutty grandkids)

If you look closely in the picture you can see all of my candy bars aren't wrapped yet. That is because my kiddos have yet to write their little love notes and draw their cute little pictures. Only my notes are finished. See I told you it was a last minute gift. But one that I think will be cherished by the recipients.


 A picture of my hubby's treat basket!

Another photo of my dad's treat basket! I used a recycled doughnut box for his. Since we have to take it to him I like that it is all sealed up inside.  


Thursday, June 17, 2010

Is there anything better than......

Is there anything better than a nap on a rainy afternoon?

Or hitting the snooze after your first nap and taking a second, even longer yet, nap.

Making a big breakfast and enjoying it with your family.

Cleaning house and seeing progress on some of the "worst" rooms.

Having everyone gone from the house long enough to be able to walk out of a room and then back into it and have it still be clean.

But not having them gone tooo long.

Watching your 8 year old's baseball team win the little league championship game.

Seeing the proud smile on your hubbies face, who coached that team.

Finally breaking the sewing machine back out to get a little creative on this rainy day.

These pretty much sum up my last 24 hours. Not in any particular order or timeframe, just random blessings as I remember them.

I am so blessed. God is so good.

Saturday, June 5, 2010

Starting off with a BANG! (sort of)

At my house the 4th of July is a BIG deal. A BIG, BIG deal. This year will be our 10th year of hostessing a 4th of July BBQ and celebration for my friends and family. Each year the guest list and menu change, and as the children get older or we add different ones to the mix I come up with different activities. Everyone seems to have a good time and relaxes. Everyone except me. I truely love holding this BBQ but being the Queen of procrastination and all I usually am stressed doing last minute things. And EVERY year I think to myself, WHY didn't I start all this a month ago!

Well guess what? Yesterday was a month from the 4th of July! And I started my preparations. Well..........sort of......but I did get a few important details taken care of. For starters as I was thinking/daydreaming about the 4th I realized that it is on a Sunday this year. No biggie right, except I WORK on Sundays. oY! not good! So I thought I would see if I could switch shifts this year and work the morning shift. It took a lot of nerve to ask, but I did, and yes! I can so.... yeah! I also made my guest list and menu and starting jotting my to-do list, to - buy list, and great ideas list down. Whew! That took a lot of ink!

Today I am going to take some more action and hopefully make some napkin rings for banding the silverware and napkins together with. I think I am going with denim this year. I thought about adding red star buttons but on second thought I don't think I will. I will leave them pretty generic and that way I can reuse them for different events, and not just the 4th of July!

I will be posting pictures and blogging about my progress, if for no other reason than to hold me accountable. I am hoping for a relaxing stress free day! Even if I do have to work the morning of!

Have you started thinking about the 4th yet? It tends to sneak up on us!

Tuesday, June 1, 2010

A great cause - A red tent project....

I was blog hopping on Sunday and came across information about this cause that grabbed hold of my attention. Angie from Love is Spoken Here wrote about a project called the Red Tent Project.  Here is a run-down, she is asking woman, crafters to sew reusable sanitary supplies for girls in Ethiopia. A simple, affordable and very doable way to touch someone's life and make it a little better.

here are some facts:


*ordinary woman are unable to afford basic sanitary protection.


*one pack of sanitary pads costs more than 50% of the average monthly wage for women.


*millions of african women are forced to replace tampons/pads with newspapers and dirty rags.


*this can lead to vaginal infections for which there is no available medication.


* these vaginal infections are often mistaken to be sexually transmitted infections leading to social embarrassment and domestic violence.


*wives and mothers are unable to work when they have their periods, further hindering already impoverished families.


*girls are forced to take time off school, further jeopardizing their education.


*because of the economic and cultural crises in africa, its schools serve as more than academic centers. they provide community resources where young people receive basic care and services, such as food programs, clean water and counseling
 
So I am urging you to get in touch with Angie for the directions and patterns, gather a group of caring woman together and help out with this cause. I am gathering a group of ladies together in my church basement next Tuesday so we can make a small difference. Woman to woman......

Thursday, April 15, 2010

Every Crafty Endeavor has stopped by to say Hello!

Hey Make it Sparkly Fans!! I am excited to be here today and have a fun project for you! My name is Amanda and I am the creative mind behind “Every Crafty Endeavor.” I am married to a dashingly handsome, hard-working man named Spencer and we have a little boy named Quinn! I work part time as a writer on a marketing team for an Engineering Company and craft in my “spare time.” I have been a “mommy blogger” for a couple years – and started Every Crafty Endeavor to showcase some crafty ideas that I have done. I love to craft and cook and I have lots of fun ideas and tutorials that I love to share. I am constantly thinking about things to cook, make or sew, accessories that pop, ways to decorate my home and things to photograph.


When you stop by and visit me you will find projects and recipes like:


Today I would like to do a tutorial about how I made Glazed Wall Art for my bathroom.

But really - you can use it in any room!


I needed something so fun for the walls and I wanted a lot of color

to make the room pop a little.

First: Gather your supplies!

You will need:

  • 12x12 scrapbook Paper

  • 12x12 Plywood

  • "Pour-On" Glaze

  • Spray Adhesive

  • Glue Gun

  • Ribbon

  • Plastic Cups

Second: Spray the back of your paper with the adhesive

and glue them to the plywood.

(hint:) I had my hubby cut up a sheet of plywood in advance.

We found it in the lumber section at Home Depot and

one small sheet made 8 12x12 pieces.

I am making some without the glaze for my spare bedroom.


Third: Cover your table and set the wood up on plastic cups.

Make sure your cups are all they way underneath the wood,

so if you do happen to drip a little, it doesn't stick to the cups.


Fourth: Mix and Mix and Mix your Pour-On.

This is the same stuff you use for the Glazed Washer Necklaces.


Fifth: Pour it onto your paper and spread it evenly around.

I used the back of a plastic spoon, but you can use a Popsicle stick too.


(Hint:) The glaze will turn your paper a little bit see-through -Sixth: Let them dry for a day or two.

it's not big deal unless the back has really funky designs on it.

Most scrapbook paper has a plain color or white back which work better

than those with dots or other things.

Three of my papers had little designs on the back - Two looked really awesome!

One - went in the garbage.


Seventh: Flip your art work over and measure 6 inches to find the middle.


Eighth: Hot glue your ribbon on the back.


Ninth: Hang them up and enjoy!!


When you have a minute, please stop by and say hello and see what other crafts I have been working on. I am always looking for new ladies to blog swap with and fun crafty ideas for my Friday Favorites.
Thanks Kelly!! It has been fun!

Wednesday, April 14, 2010

Hello Again...my friends!

Hello sweet people!

Have you ever had so much crap pile up on you that you feel like you are just stuck? That has been me for the last couple of weeks! I have felt so overwhelmed with...

homeschooling...and the end of the year rush

a conference for church....it was awesome, fantastic, refreshing, inspiring, and tiring!

teenager troubles.....pretty serious one, plus the normal headaches

an 8 year old......who has decided he has learned all he is going to this year, and would much rather play outside

my new diet and exercise!.......whoo hoo........ 6 pounds down, a whole bunch to go!

financial nastiness......blech!

I have not crafted a single thing! It is such a bummer, so I logged on tonight to see what has been up thinking most of you all had probably deserted me and I was so shocked to find out that NO, ya all are still here, plus 2 new followers! Yeah!

And since I am overwhelmed maybe some of you have been too, so I am leaving the stamp set give-away open until Saturday night! Click here to enter!

Thank you all for sticking with me!

Thursday, March 25, 2010

Easter Wall Hanging with Foamboard Shelf!


This is my project for Living With Lindsay's $5.00 Challenge. Wandering around the $ store I knew exactly what I wanted to make but couldn't find the most critical aspect, the shelf. Finally I went down the office supply aisle and the light dawned!

Here is how I spent my $5.00. 1 piece of foamboard, 2 decorative bunnies, 1 bag of moss, and 1 picture frame. I also used paint, glue, and a scrap piece of paper out of my stash.

First of all I cut a piece of foamboard to replace the cardboard in the frame. This I covered with a piece of scrapbook paper.


Then out of the foam board I cut two rectangles. Just shorter than the inside of the frame and just wide enough for the two bunnies to fit on.


I used hotglue to glue these two pieces of foamboard together. This strengthens your shelf considerably, the hotglue melts the foamboard slightly and melds the two pieces together slightly. 

Meanwhile I had a BIG decision to make, should I leave the bunnies colorful or should I paint them to unify them and make them a little more elegant looking. In the end they got a good coat of Oil Rubbed Bronze Spray Paint. I think it is their pink eyes that sealed their fate. I also painted the frame Oil Rubbed Bronze.

While my precious bunnies were drying I started glueing moss all over my foam "shelf". I know alot of people say to use spray adhesive with their moss projects but I think the moss starts shedding when I used it so I use my trusty glue gun and I know that moss is staying where it needs to stay!

This is the poem I used, and yes I wrote it, I can't believe I am posting that because I never feel comfortable sharing poems or songs that I write. I am pretending it is like a conversation that my two little bunnies are having. There are lots of springtime songs on the internet or you can use this one if you want.

Springtime is here, my dear, my dear,

Springtime has sprung this morning.

Springtime is here, the birdies I hear,

Winter had better take warning.

Springtime is here, warm weather is near,

I feel the sun’s warm rays.

Springtime is here, my heart full of cheer,

To be enjoying springtime days.

Springtime is here, no need to fear,

Springtime has surely sprung.

Springtime is here, we’ve waited a year.

To hear the birdies songs sung.

- Kelly Brumley


Okay nobody thinks I am cheesy now right? Well don't tell me if you do! I printed this poem off on cardstock and inked the edges with a brown inkpad.  I then hotglued it to the paper covered foam board. I think it is time for a little assembling. So I glued the foamboard shelf, now covered with moss) onto the picture frame. I held it in place while it got very sturdy and the glue hardened right up. Then I glued my little bunnies onto the shelf, I also glued their little backsides onto the foamboard in the picture frame so that helps support the shelf and bunnies!


I am so pleased with how this turned out! I am loving it! And it doesn't have to come down right after Easter, it can stay up througout spring. Which is nice since Easter is coming early this year!


Happy Spring!

Wednesday, March 24, 2010

50th Follower Stamp Sets Giveaway

I was so tickled when my "followers" reached 50! It made my day! I have a fun giveaway planned to celebrate! I will be giving away 3 sets of stamps. The first group is a set of 7, the second set is a set of 3, and the third set is a set of 2 spring stamps. These fit perfectly with the projects that I am going to do tutorials on soon.

Here are the different ways to enter: LEAVE ME A SEPERATE COMMENT FOR EACH! Yes, I was shouting, not in a mean way though! Just in a please, please, pretty please way. It makes me sad when I see someone who didn't get the full amount of entries because they only left me one comment when they should have 2 or 3! Get 1 entry for leaving me a comment telling me what your favorite season is. Another entry for becoming a follower of my blog or for being a faithful follower. (Leave a separate entry). And finally give a little shout-out on your blog or blog sidebar for a third entry (leave a separate entry).

Oh and to appease my husband I will clarify two things, 1. If your number is picked twice, you win twice, I trust you will pass along the duplicates or give them away on your blog or line them up like decorative blocks or ya know, something! and 2. Yes honey I will ship these out fast enough that it won't be fall before they get their spring stamps. I am terribly slow but I do TRY!

As for my favorite season, it is FALL! I simply can't help it; to me there is nothing in the world better than snuggling up in a sweater while the rain is pouring outside and the soup is cooking in the crock-pot inside! Preferably I am reading a good book with one of my lovies or all by myself. And another thing I love about fall is the chance of rain days. My hubby works an occupation that if it rains TOO hard he is rained out, hard on the paycheck sometimes but oh so easy on my heart! I love having him come through the door with a flannel on, a big smile on his face, and watching him put his muddy work boots by the side of the door. It warms my heart right up! Our town fair is also in the fall, Mikey's birthday is in the fall and don't get me started about Halloween and Thanksgiving, two of my favorite holidays! I simply love fall. All the other seasons have lovely traits too but fall is the best in my opinion!


So in summary:
*Leave me a comment about your favorite season
*Follow Make It Sparkly Mama
*Give a shout-out about my giveaway

And leave me a comment about each!

Thank you so much for your support and sweet comments! I am lovin' this blogging thing!  The winners will be announced on Monday, March 29th during my first linky party, Making Me Happy Monday!

Monday, March 22, 2010

New Desk Accessories

So I have had these desk organizers for years, they used to be boring oak colored. I don't have before pictures because I was too excited to get painting and couldn't find my camera! I spray painted them matte black and then scuffed them up to look old. Then I glued some scrabble tiles on to spell out "Read" and "File". I almost used Tile letters out of my own Scrabble game but then thought better of it and bought some at a craft store! Maybe if they are pretty than I will be more tempted to actually use them versus just piling things on my desk.


I am thinking of making the second piece into a charging station for the cell phones and such.

Friday, March 19, 2010

Blog Swap with Making The World Cuter!

Today I am blog swapping with Tiffany from Making The World Cuter! I am so excited to have her over here and so excited that this is my first blog swap! She has tons of adorable projects so hop on over there and check her out! Thanks Tiffany for stopping by today!

Hi you cute Sparkly Readers!
So fun to be here over at Kelly's place!

I'm Tiffany, you can call me Tiff.
Here I am with my hot hubby, who makes me smile every day.
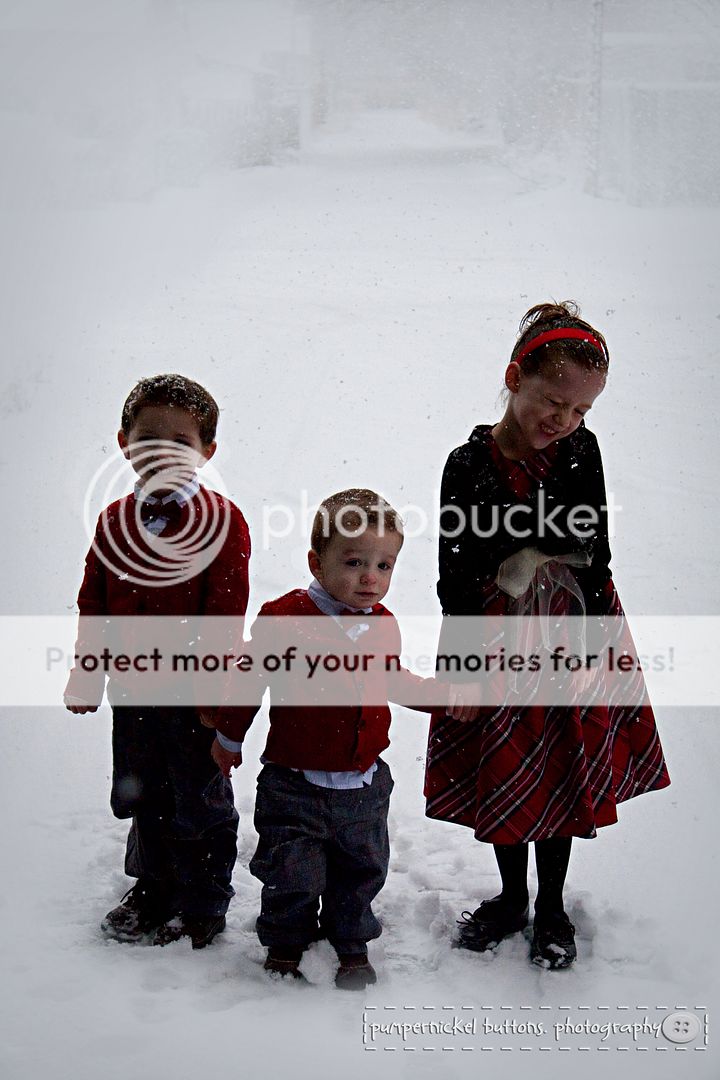
Here are my 3 stinkin cute kids that make me happy and crazy all at once, and we are having another this fall.
We live in a fun little town in Southern Oregon, where my hubs is going to school. I take pictures on occasion, and as soon as I am done with this morning sickness, I plan on taking lots more. I have a little photography blog as well. Pumpernickel Buttons.
If you've never been over to Making the World Cuter;
Here's a little glimpse of what goes on...
  • Monday-Making the World Cuter Mondays-a linky party for you to show off all the cute things you have made in the past week
  • Tuesday-Toot Toot Tuesdays-Where I share a new, usually on the cheap, tutorial to make something crafty and fun.
  • Wednesday-WooHoo Wednesdays-Sometimes we'll have giveaways, sometimes a yummy recipe, sometimes a bonus crafty something...always something fun!
  • Thursday-Three things Thursdays-Just a day to share three things that have been going on, or talking about my three "things" or whatever.
  • Friday-Friendly Friday-Your looking at it! Swapping with the fun and cute blogs all over the place and having a blast making new friends! :)
Here are a few of my tutorials that I have shared recently...

Easy towel poncho (it's still cold here, so my son wears it watching movies in his jammies-can't wait for summer!)
Make your own blocks (I love to make these sets up for birthday and baby shower gifts!)


This wreath (using salt dough to make buttons, and just things I had around the house, this wreath was practically free!)
And finally these EASY napkin rings, (these are free, as long as you have a cardboard tube, a hot glue gun and fabric scraps of any kind!)
Thanks so much Kelly!
Thanks for making the world a little sparklier!
Can't wait to see what you come up with next!